

Facebook Custom Audience is a popular targeting tool that lets you find people on Facebook, who are interested in your business. It lets you create custom audiences through customer lists, Facebook engagement, and website/app traffic.
RudderStack lets you send your customer events for creating custom audiences by leveraging the Facebook Marketing API.
You can now send your customer events data list directly for adding them to already created Facebook Custom Audience through RudderStack.
Getting started
To enable sending your event data to Facebook Custom Audience, you will first need to add it as a destination in RudderStack.Once the destination is configured and enabled, events from RudderStack will start flowing to Custom Audience.
Before configuring Facebook Custom Audience as a destination, verify if the source platform supports sending events to Custom Audience by referring to the table below:
| Connection Mode | Web | Mobile | Server |
|---|---|---|---|
| Device mode | - | - | - |
| Cloud mode | - | - | Supported |
Once you have confirmed that the platform supports sending events to Custom Audience, perform the steps below:
- From your RudderStack dashboard, add the source. Then, select Facebook Custom Audience from the list of destinations.
- Assign a name to the destination and click on Next.
Connection settings
To add Custom Audience as a destination in RudderStack, you will need to configure the following settings:

 Facebook Custom Audience Setup
- Access Token: Enter the access token of your business application set up for accessing the Facebook Marketing API.
Check the FAQ section for more information on how to find your User Access Token.
- Audience ID: This is the custom Audience ID to which the audiences will be added/removed.
Check the FAQ section for more information on how to find your Audience ID.
- Schema Fields Choose your schema fields (at least one) from the available options. This is a mandatory field. RudderStack expects the user events to consist of every schema field that has been chosen on the dashboard.
RudderStack will ignore any user information which does not adhere to the schema fields specified in the dashboard settings.
Some other important settings include:
- Enable Hashing: Facebook expects the user data to be hash encoded using
SHA256. if this option is enabled, RudderStack will hash encode the user data irrespective of the schema type chosen in the RudderStack dashboard. - Is The Data Raw: As RudderStack does not support combinational schema fields, this field will be ignored if not enabled.
- Audience Batch Size: Specify the size of data you want RudderStack to send to Facebook in a single event. For example, if you want to send a total 1000 user records to Facebook and set the batch size to 50, then Rudderstack will send 20 events to Facebook with 50 user records in each event.
- Disable Formatting: Facebook has fixed data formats for all the allowed schema fields. If this option is enabled, RudderStack will not format the user data before sending it to Custom Audience.
- Skip Verify: This option lets Rudderstack handle all the null/undefined user properties before uploading them to Facebook Custom Audience.
- When disabled, RudderStack discards the entire batch of events if any of the user attributes are
null, according to the schema fields. - When this option is enabled along with the Enable Hashing setting, the null values are replaced by an empty string
“”, hashed, and then sent to Custom Audience. - When this option is enabled and the Enable Hashing setting is disabled, Facebook throws an error as it does not take null values.
- When disabled, RudderStack discards the entire batch of events if any of the user attributes are
- Type: Specify the type of the custom audience here. This field will be ignored if left as
NA. - Sub Type: This is the sub-type of the custom audience. This field will be ignored if left as
NA.
audiencelist event structure to send user data to Custom Audience
audiencelist calls.The add and remove arrays containing the user data objects are expected inside the properties field of the audiencelist event. These arrays are wrapped inside the object listData.
- add: This array refers to the user information that needs to be added to Custom Audience.
- remove: This array refers to the user information that needs to be deleted from Custom Audience.
Schema fields mapping
The following table details the mapping of the schema fields specified in the RudderStack dashboard and the Facebook Marketing API.
| Dashboard Field Name | Marketing API Schema Field (Rudderstack Supported Field Name) | Field Guidelines |
|---|---|---|
EMAIL | EMAIL | Trim any leading or trailing whitespaces and convert all the characters to lower case. |
PHONE | PHONE | Remove symbols, letters, and any leading zeroes. The country code is needed as a prefix, if the COUNTRY field is not specified in the dashboard. |
GENDER | GEN | Use these values: m or male for male and f or female for female. |
MADID | MADID | Use lowercase and keep the hyphens. This information will not be hashed. |
EXTERN_ID | EXTERN_ID | This information will not be hashed. |
DOB YEAR (YYYY) | DOBY | Use the YYYY format from 1900 to the current year. |
DOB MONTH (MM) | DOBM | Use the MM format from 01 to 12. |
DOB DATE (DD) | DOBD | Use the DD format from 01 to 31. |
LAST NAME | LN | Use a-z only. Lower case only, no punctuation. Use special characters in the UTF-8 format. |
FIRST NAME | FN | Use a-z only. Lower case only, no punctuation. Use special characters in the UTF-8 format. |
FIRST NAME INITIAL | FI | Use a-z only. Lower case only. Use special characters in the UTF-8 format. |
CITY | CT | Use a-z only. Lower case only, with no punctuation, no special characters, and no whitespace. |
US STATES | ST | Use the 2-character ANSI abbreviation code in lower case. Normalize the states outside the US in lowercase, with no punctuation, no special characters, and no white space. |
ZIP | ZIP | Use lower case and no white space. For the US, use only the first 5 digits. For the UK, use the Area/District/Sector format. |
COUNTRY | COUNTRY | Use lower case, 2-letter ISO 3166-1 alpha-2 country codes. |
RudderStack modifies the schema names visible in the dashboard to ensure better readability. However, during the event call, the field names must be exactly the same as the schema names specified by Facebook Marketing API, as mentioned in the table above.
Explicit formatting feature
If the Disable Formatting option is enabled in the RudderStack dashboard, RudderStack will not format the user data in the format prescribed by the Facebook Marketing API. If it is disabled, RudderStack formats the schema fields input by the user as shown in the table below:
| Schema Field Name | Example Input | Formatted Output (Before Hashing) |
|---|---|---|
EMAIL | ABC@gmail.com | abc@gmail.com |
PHONE | 0@96346895 | 96346895 |
GEN | FEMALE | f |
DOBD | 2 | 02 |
DOBM | 1 | 01 |
LN & FN | Abc,@ | abc@ |
FI | Mr. | mr. |
CT | HN# | hn |
ST | ? AL ? | al |
ZIP | 11502 @bc | 11502@bc |
COUNTRY | IN | in |
The following code snippet shows a audiencelist event with the schema fields (e.g.EMAIL,FIRST NAME) specified in the RudderStack dashboard:
{ "type": "audiencelist", "properties": { "listData": { "add": [{ "EMAIL": "name1@abc.com", "FN": "name1" }, { "EMAIL": " 'name2@abc.com", "FN": "name2" }, { "EMAIL": " 'name3@abc.com", "FN": "name3" } ], "remove": [{ "EMAIL": "'name4@abc.com", "FN": "name4" }, { "EMAIL": "'name5@abc.com", "FN": "name5" } ] } }}Facebook Custom Audience payload restrictions
| Payload Field | Transformed? |
|---|---|
Using only add | Yes |
Using only remove | Yes |
Using both add and remove | Yes |
Not using both add and remove | No |
The following code snippet shows a audiencelist event having only add with the schema fields (e.g.EMAIL,FIRST NAME) specified in the RudderStack dashboard:
{ "type": "audiencelist", "properties": { "listData": { "add": [{ "EMAIL": 'name1@abc.com', "FN": 'name1' }, { "EMAIL": 'name2@abc.com', "FN": 'name2' } ] } }}Similarly, you can use remove in order to remove users from a particular custom audience without creating a session.
The event payload must include add or remove . Otherwise, the user data won’t be transformed and sent to Custom Audience.
FAQs
How do I create a new audience list?
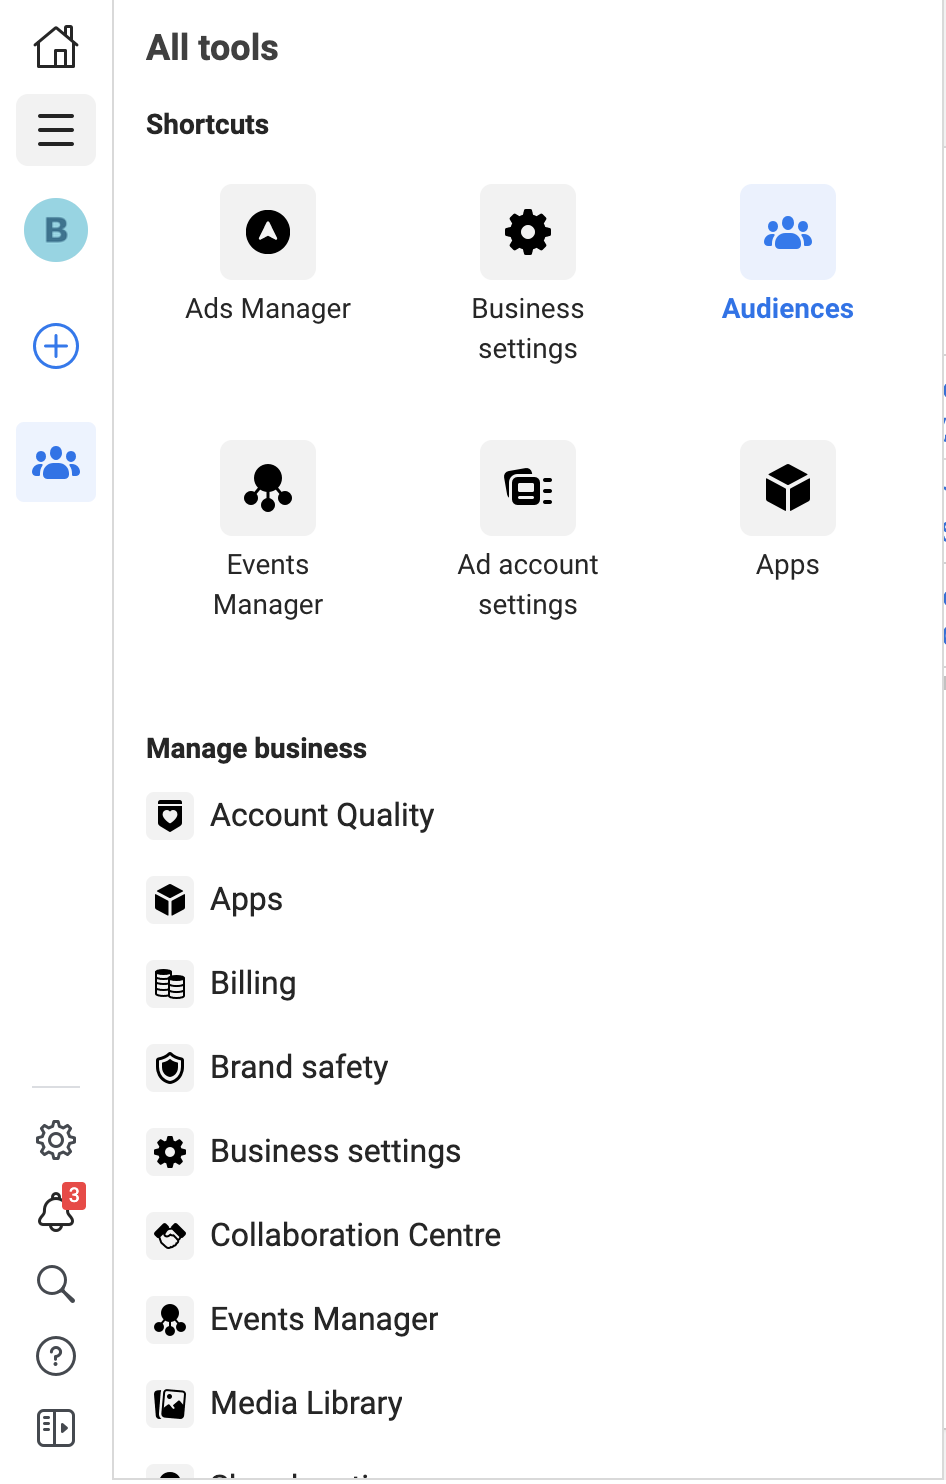
- Go to the Audiences option in your Facebook Ad Manager account.
- Select Customer list as your Custom Audience source and click on Next.

- If your list includes a column for customer value, then select the Yes option, else select No and click on Next.

- Add the list that you want to use for your new Custom Audience and give it a name. You can upload either a CSV or a text file.
- Prepare your customer list by selecting and mapping the identifiers.
- Once your list is added and ready for use, click on Upload and Create.
How do I check if the custom audience has edit permissions?
To check if the audience has edit permissions enabled, go to the Audiences tab, select your custom audience, and check the Actions dropdown. You should see the Edit option as seen below:

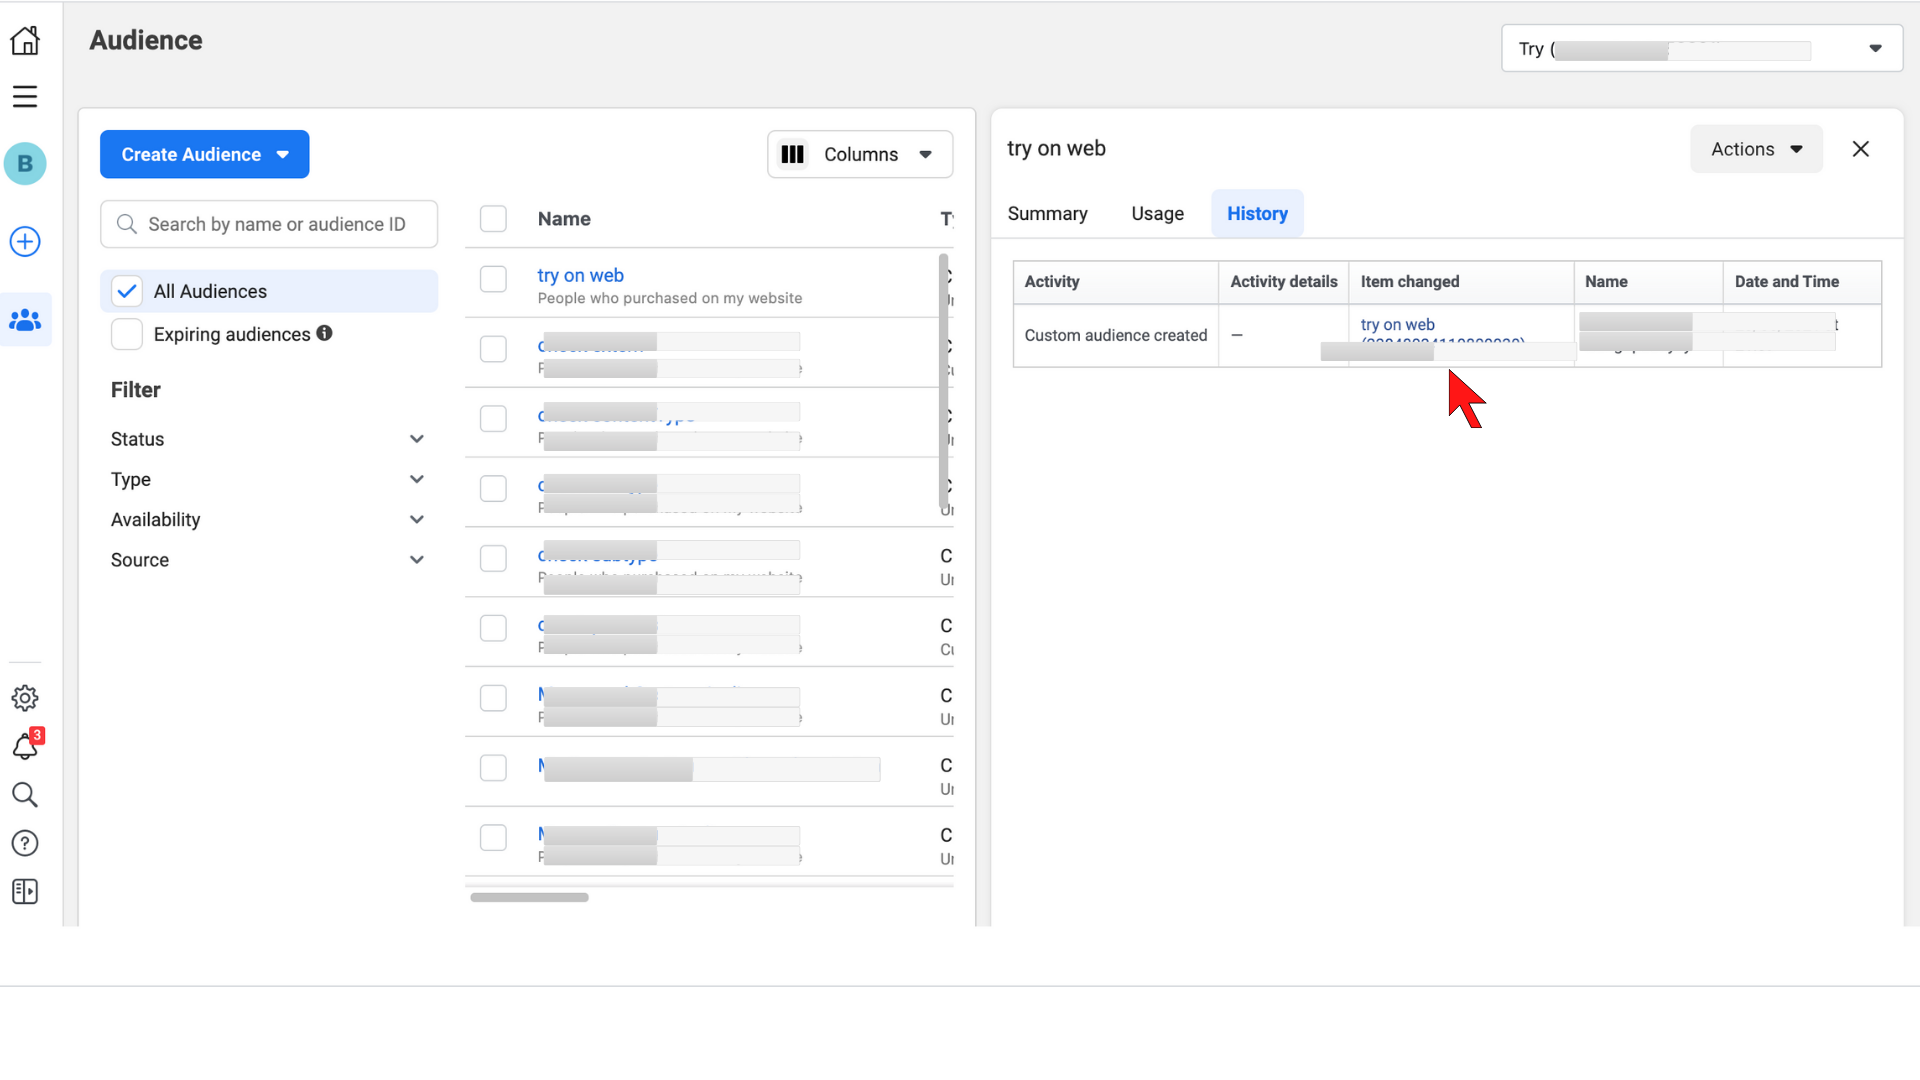
Where can I find the Custom Audience ID?
- To get your Custom Audience ID, go to your Facebook Ads Manager account. On the left navigation bar, select Audiences and choose the Ad account you have created the custom audience for.
- Then, click on All Audience and select the specific custom audience from the list.
- Finally, click on the History tab. Here, you will find the audience ID under the Item Changed column, as shown:
Where can I find the user Access Token for the application?
To use the Facebook Marketing API, you need to generate a user access token. Follow these steps to generate a user access token using your Facebook Developer account:
- Log into your Facebook Developer account.
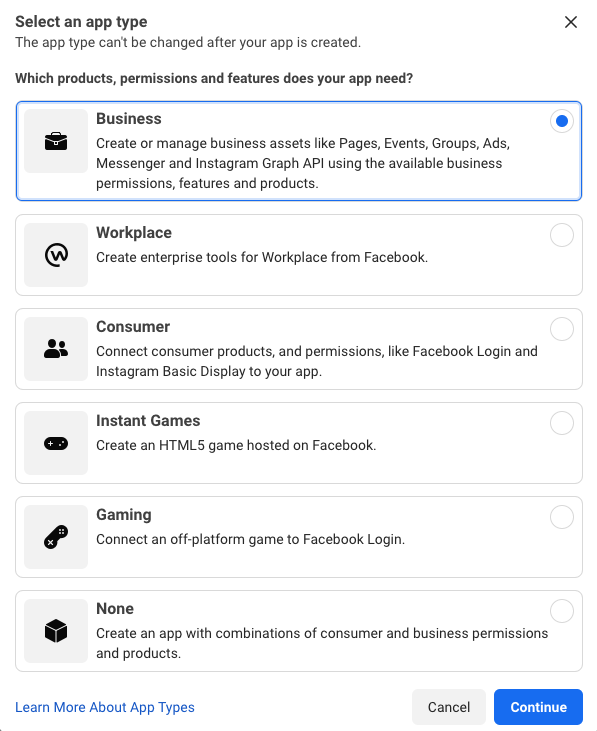
- If you haven't created an app already, do so with the type Business, as shown:
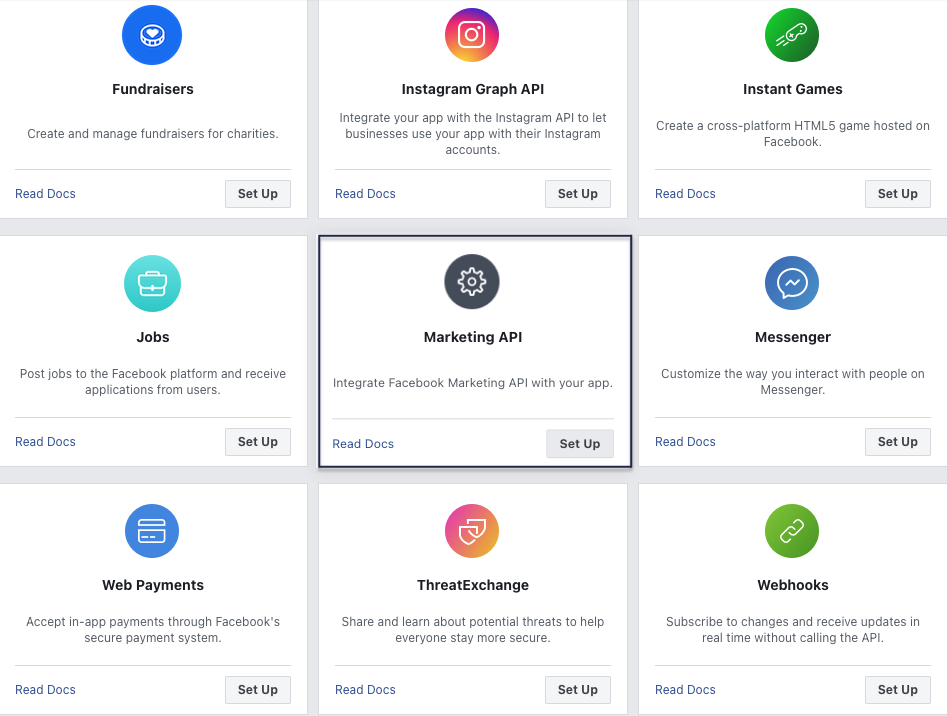
- Set your app up with the Marketing API as the product, as shown:
- Next, in the left navigation click bar, click on the Tools option under Marketing API , as shown:

- Under Get Access Token, select ads_management and ads_read as the token permissions and click on Get Token:

- Copy this access token. Note that this access token will expire after a specified time and hence should not be hardcoded into your app.
For more information on using this access token or generating the access token via your app, refer to the Facebook developer documentation.
Should I use sessionIdAdd or sessionIdDelete before adding/removing users in Custom Audience?
sessionIdAdd and sessionIdDelete helps you track and use a particular session ID while adding or removing users. This is useful when you are sending data in chunks. If you do not include these fields, Facebook creates a session ID itself.
Refer to the Facebook documentation for more information on this.
Contact us
For queries on any of the sections covered in this guide, you can contact us or start a conversation in our Slack community.