Google Optimize is Google's free website optimization tool that lets you run different website tests to tailor personalized user experiences and increase your conversion rate.
RudderStack supports Google Optimize as a destination to which you can seamlessly send your website data for efficient A/B testing.
Getting started
Before configuring Google Optimize as a destination in RudderStack, verify if the source platform is supported by Google Optimize by referring to the table below:
| Connection Mode | Web | Mobile | Server |
|---|---|---|---|
| Device mode | Supported | - | - |
| Cloud mode | - | - | - |
Once you have confirmed that your source platform supports sending events to Google Optimize, follow these steps:
- From your RudderStack dashboard, add the source. From the list of destinations, select Google Optimize.
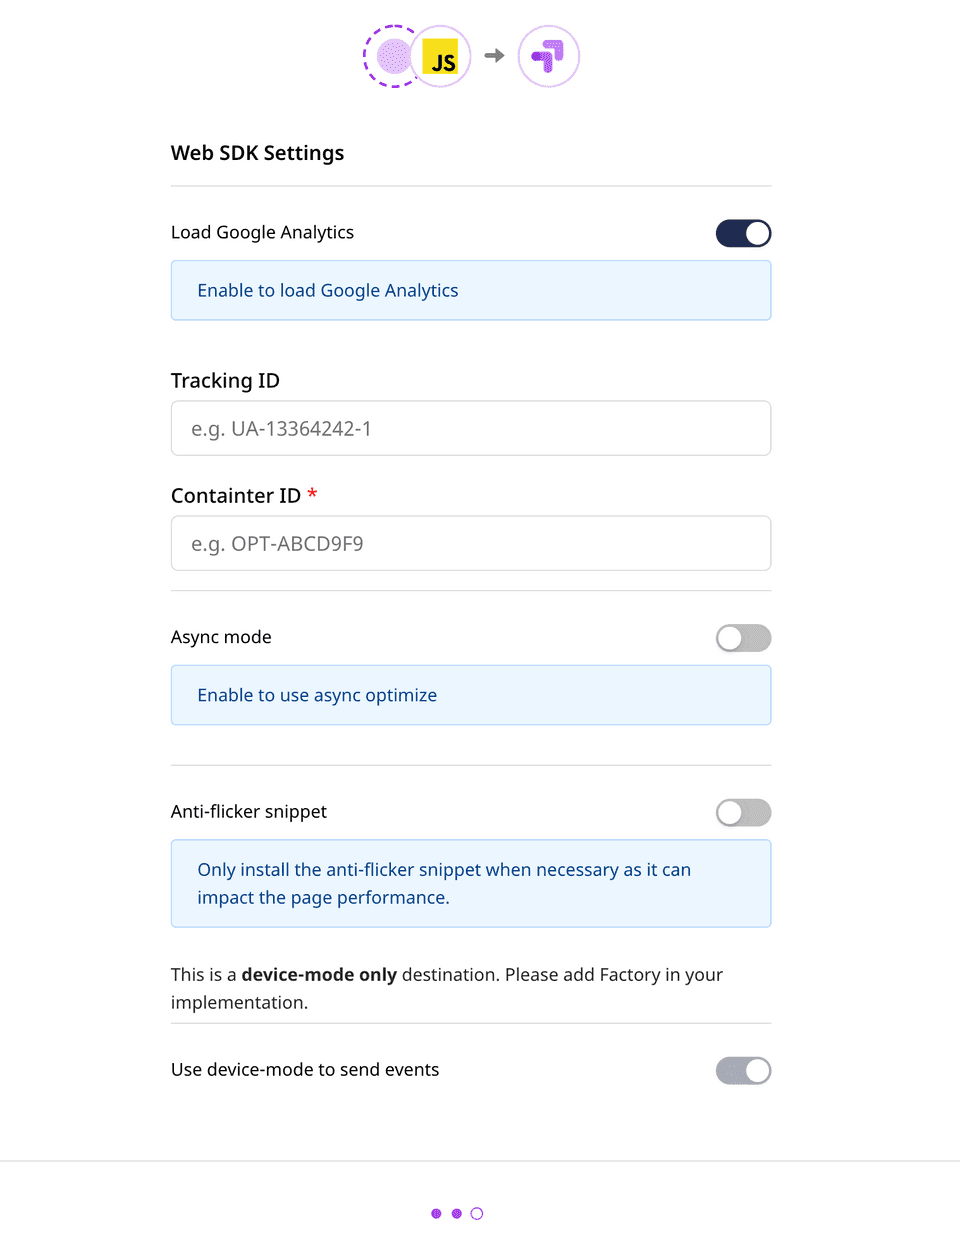
- Assign a name to the destination and click on Next. You should then see the following screen:

Connection settings
The connection settings required to configure Google Optimize as a destination in RudderStack are listed below:
- Load Google Analytics: Enable this setting only if Google Analytics is not installed on your website already.
- Tracking ID: If you have enabled the Load Google Analytics option, enter the corresponding tracking ID here.
- Container ID: Enter your Google Optimize container ID here.

- Async mode: Enable this setting to use the asynchronous version of Google Optimize.
- Anti-flicker snippet: Enable this setting to install the anti-flicker snippet.
- As this destination supports sending events only via the web device mode, the Use device mode to send events option will be always enabled.
Finally, click on Next to complete the setup. Google Optimize will now be enabled as a destination in RudderStack.
FAQs
Where do I get the Google Analytics tracking ID?
To get the Google Analytics tracking ID, follow these steps:
- Go to the Admin section of your Google Analytics account in the bottom left corner.
- Then, select an account in the Account column, followed by a property in the Property column.
- Under Property, click on Tracking Info - Tracking Code. Your tracking ID will be displayed at the top of the resulting page.
How do I link Google Optimize with Google Analytics?
To link your Google Optimize container to a Google Analytics property or view, refer to this support page.
Contact us
If you come across any issues while configuring or using Google Optimize with RudderStack, you can contact us or start a conversation in our Slack community.