Permissions Management
Detailed description of the permissions management options in RudderStack.
RudderStack's permissions management feature lets you manage users and their permissions in your RudderStack workspace.
This feature allows you to:
- Easily collaborate between other members of your organization.
- Restrict edit permissions for business-critical objects in your workspace.
- Limit access to product features where PII is exposed (for example, Live Events, debug logs, etc.) for compliance purposes.
Inviting users
To invite a member to your RudderStack workspace, follow these steps:
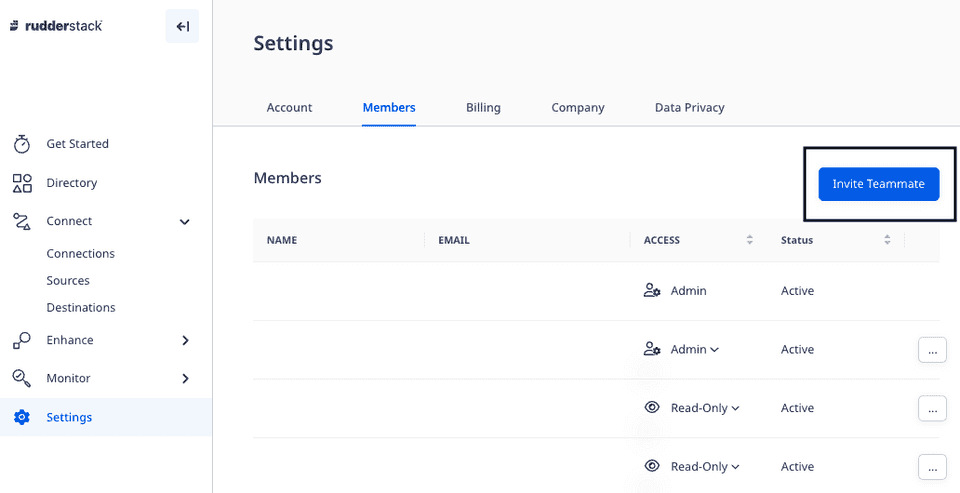
- Go to Settings > Members and click the Invite Teammate button, as shown:
- Enter the member's Email and select an appropriate role from the dropdown.
- Finally, click Invite.
Role permissions
You can assign any of the following three roles to the member you want to invite to your workspace:
- Read-Only
- Read-Write
- Admin
The following sections list the default permissions associated with each role.
Read-Only
This user role has the following permissions:
| Feature | View | Add | Modify | Delete |
|---|---|---|---|---|
| Sources | Yes | No | No | No |
| Destinations | Yes | No | No | No |
| Connections | Yes | No | No | No |
| Live Events | Yes | - | - | - |
| Transformations | Yes | No | No | No |
| Audit Logs | No | - | - | - |
| Tracking Plans | Yes | No | No | No |
| Models | Yes | No | No | No |
Some things to note regarding the read-only user permissions:
- Read-only users can view the settings of all the destinations. However, secrets like access keys are hidden from them.
- They can also view any secrets, like API keys in the transformation code.
Read-Write
A read-write user has all the permissions of a read-only user in addition to modifying the key workspace features and options listed below:
| Feature | View | Add | Modify | Delete |
|---|---|---|---|---|
| Sources | Yes | Yes | Yes | Yes |
| Destinations | Yes | Yes | Yes | Yes |
| Connections | Yes | Yes | Yes | Yes |
| Live Events | Yes | - | - | - |
| Transformations | Yes | Yes | Yes | Yes |
| Audit Logs | Yes | - | - | - |
| Tracking Plans | Yes | Yes | Yes | Yes |
| Models | Yes | Yes | Yes | Yes |
Admin
This user role has complete access to the RudderStack workspace, including all the features in the current plan:
| Feature | View | Add | Modify | Delete |
|---|---|---|---|---|
| Sources | Yes | Yes | Yes | Yes |
| Destinations | Yes | Yes | Yes | Yes |
| Connections | Yes | Yes | Yes | Yes |
| Live Events | Yes | - | - | - |
| Transformations | Yes | Yes | Yes | Yes |
| Audit Logs | Yes | - | - | - |
| Tracking Plans | Yes | Yes | Yes | Yes |
| Models | Yes | Yes | Yes | Yes |
Setting granular access controls
When you add a member to your workspace, RudderStack lets you assign any of the three default global roles - Read-Only, Read-Write, and Admin.
Although these permissions provide basic controls, they can end up being too broad or too narrow for certain use-cases. For example, admins cannot restrict access to modify a destination's settings without removing edit permissions for the user entirely.
With RudderStack's granular access control features, admins can lock down business-critical objects to a select list of people. They can also restrict PII(Personally Identifiable Information) access to certain users.
Restricting edit permissions for individual objects
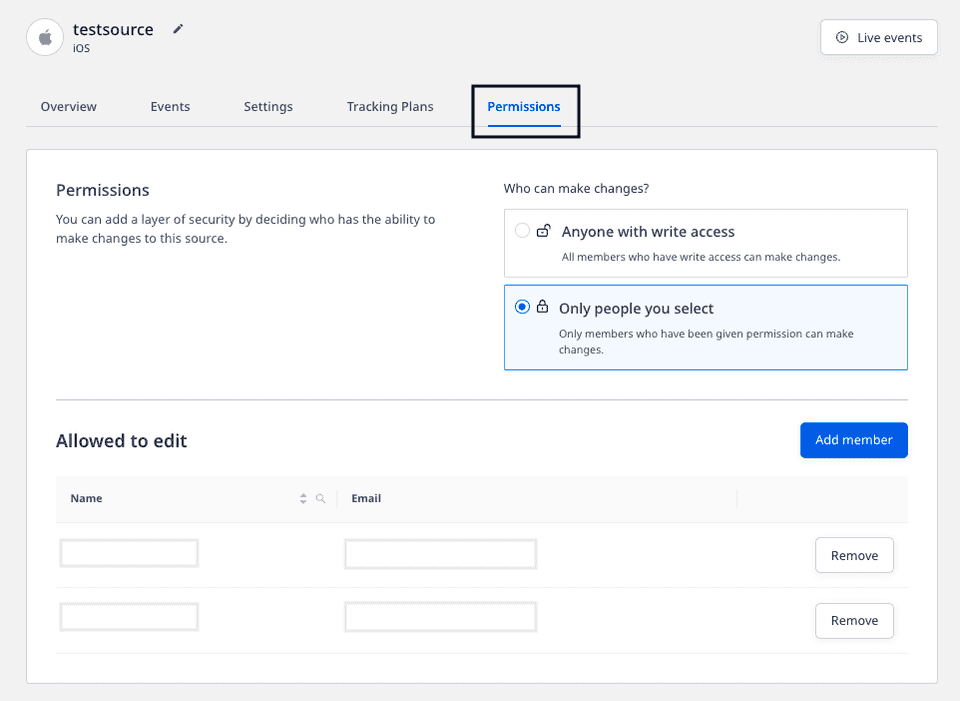
The Permissions tab in the RudderStack dashboard lets you specify the list of members having edit permissions to a given object or resource.
This tab is visible for every source, destination, and model present in the workspace, as seen below:
The edit permissions include the ability to:
- Connect/disconnect a resource with another resource. For example, source to destination, source to tracking plan, transformation to destination, model to reverse ETL source, etc.
- Enable, disable, or delete a resource.
- Edit or change the resource-specific configuration.
To specify the list of users who can make changes to a given resource, follow these steps:
- Go to the resource and click on the Permissions tab, as shown:

Under Who can make changes?, select any of the following two options:
- Anyone with write access: All the members with the Read-Write or Admin role can make changes to the resource.
- Only people you select: With this option, only the members who are given the edit permission can make changes to the resource.
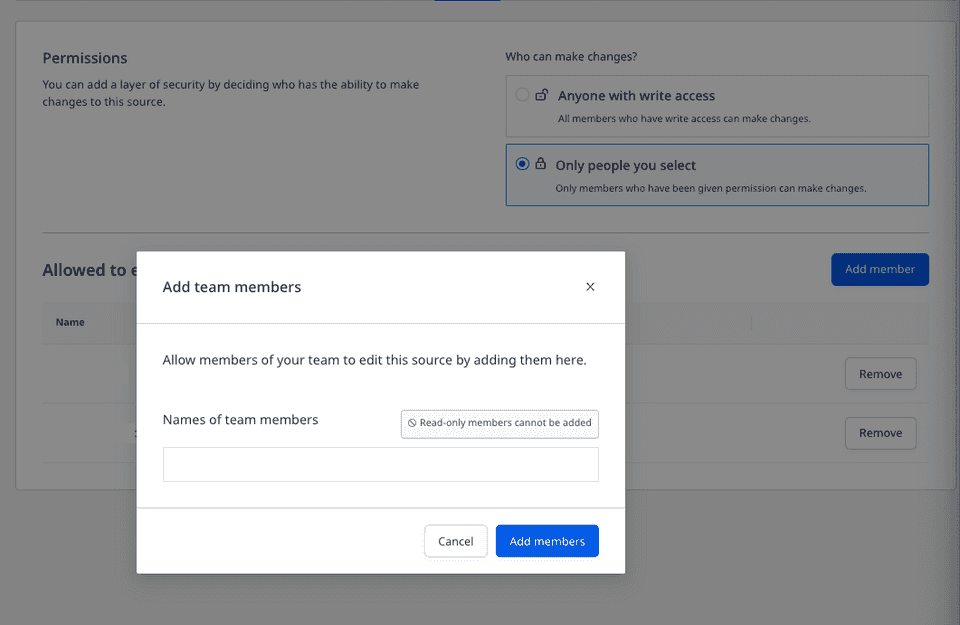
To allow specific members of your team to edit the resource, click Only people you select, followed by Add member.
Finally, select the team members from the drop-down and click Add Members, as shown:
Limiting access to PII-related features
With this feature, you can safeguard your customers' privacy by controlling who has access to the raw event data containing the PII. You can either allow anyone on your team to access the PII or restrict the access only to a select list of members.
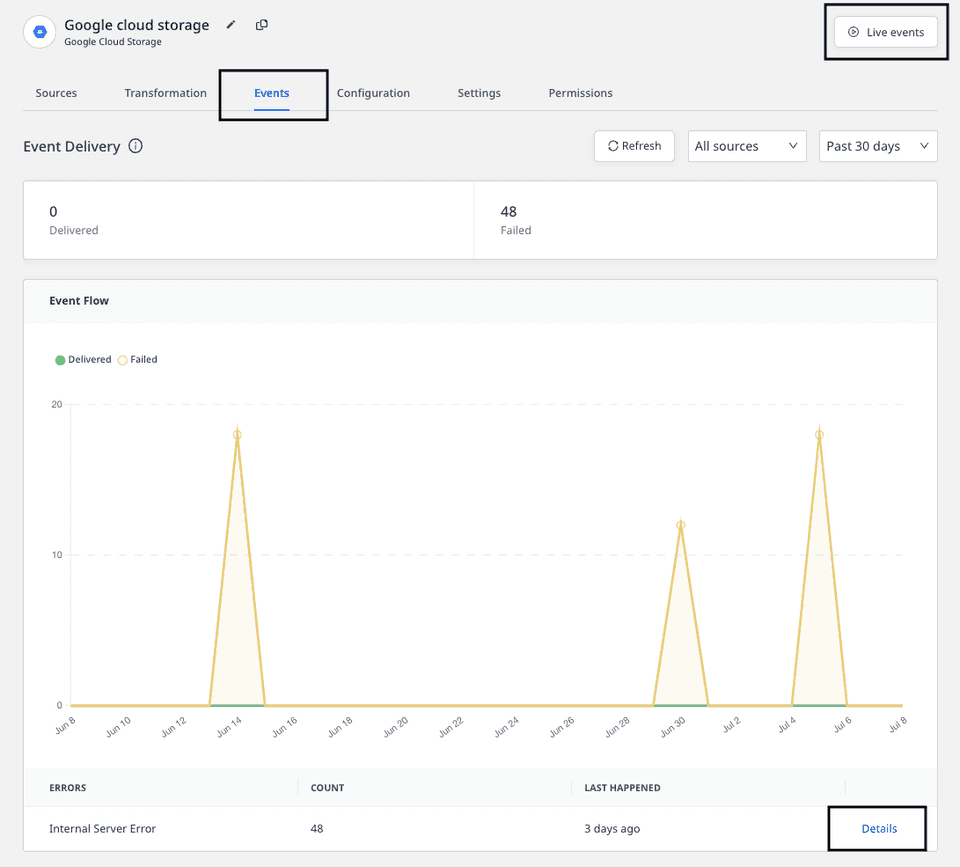
Anyone with the access can view the customers' PII in the Live Events and the error logs under the Events tab for your destination, as shown:
To set the PII permissions, follow these steps:
- In your RudderStack dashboard, go to Settings > Data Privacy, as shown:
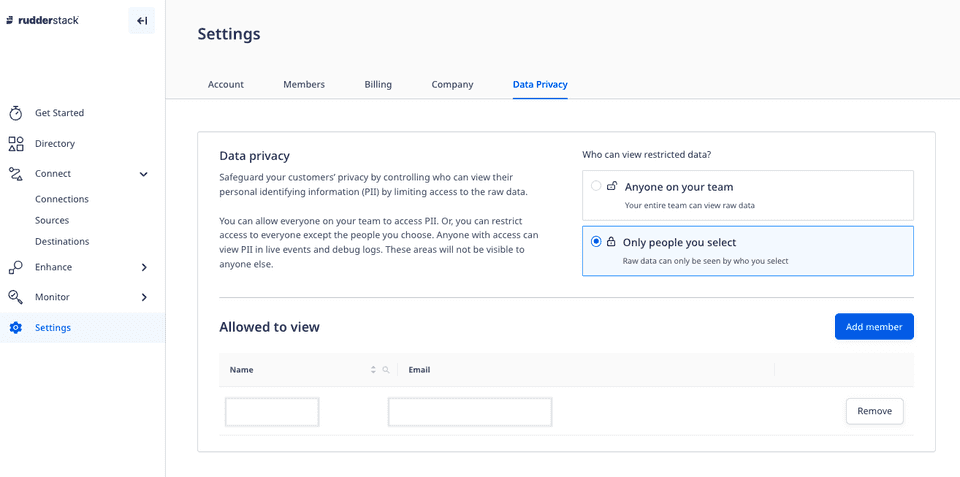
Under Who can view restricted data?, select the appropriate option:
- Anyone on your team: All the members in your workspace can view the raw event data containing your customers' PII.
- Only people you select: With this option, only the people you select can view the raw data.
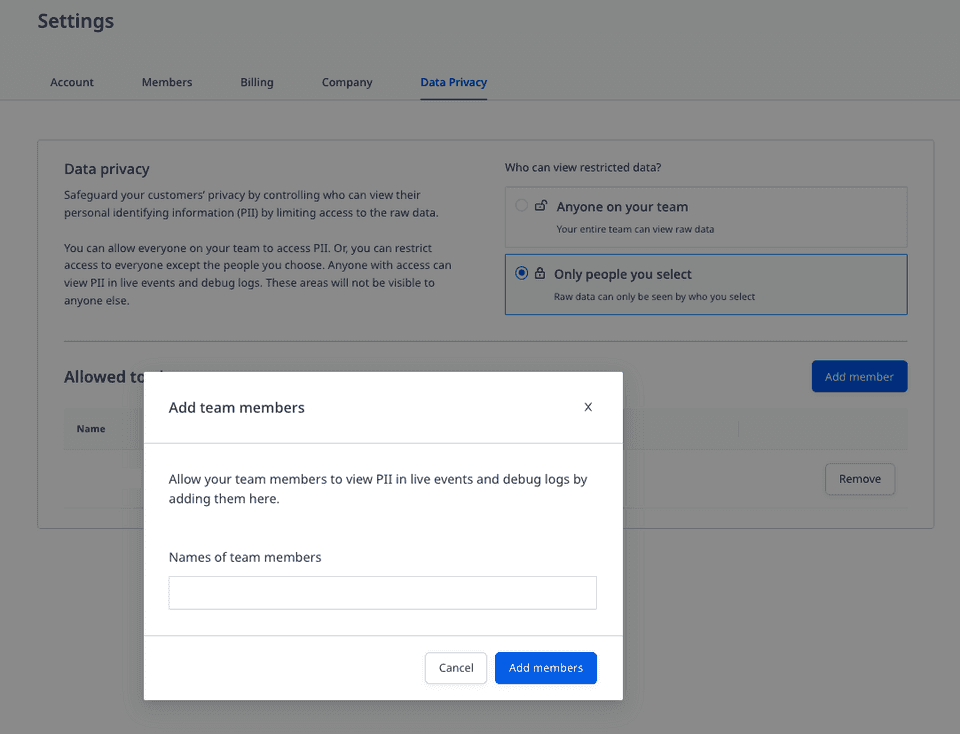
To allow specific members of your team to edit the object, click Only people you select, followed by Add member.
Finally, select the team members from the drop-down and click Add Members, as shown:
Contact us
For queries on any of the sections covered in this guide, you can contact us or start a conversation in our Slack community.