Webhook Source
Step-by-step guide to add a Webhook source in RudderStack.
RudderStack lets you add any source that supports a webhook and use it to send events to your preferred destination.
This guide will help you set up a webhook source in RudderStack.
You must also add User Transformations to transform the event data into a destination-specific format.
Getting started
This section details the steps involved in setting up a webhook source in the RudderStack dashboard.
As an example, we will ingest events from Mailchimp into RudderStack by configuring a webhook.
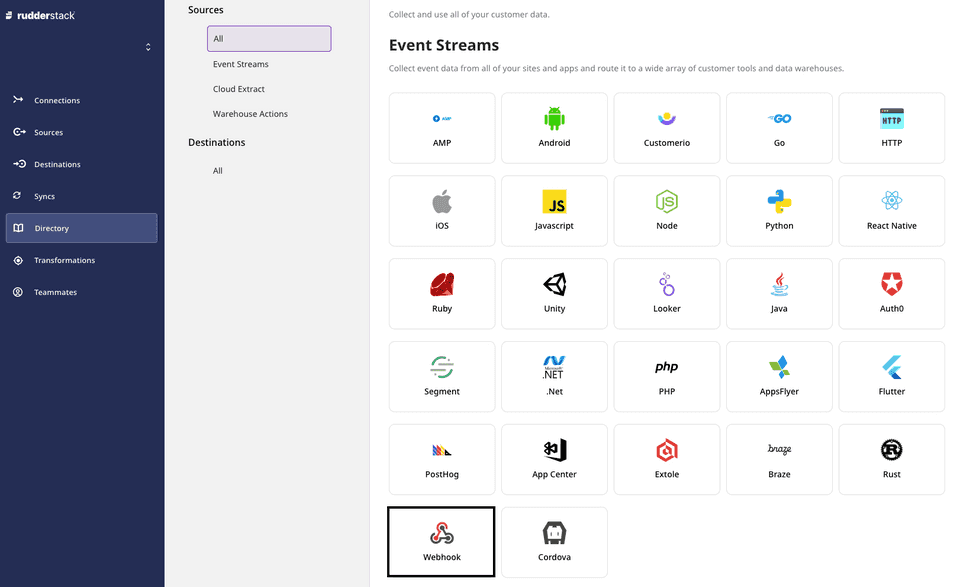
- Go to your RudderStack dashboard and click on Add Source. From the list of Event Stream sources, click on Webhook.

Assign a name to your source and click on Next.
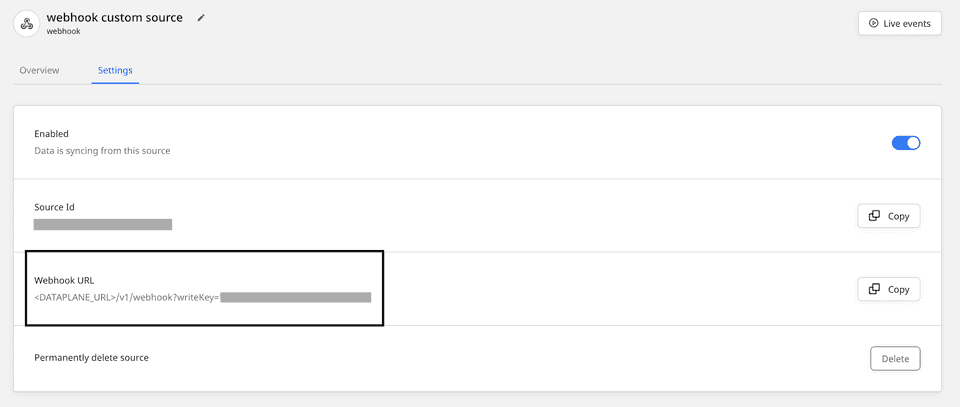
Your webhook source is now created, as shown below. Note the Webhook URL containing the Write key as a query parameter, as shown:

The webhook URL is of the following format:
http://<DATA_PLANE_URL>/v1/webhook?writeKey=<WRITE_KEY>
For more information on the data plane URL, refer to thissection.
A sample webhook URL is shown below:
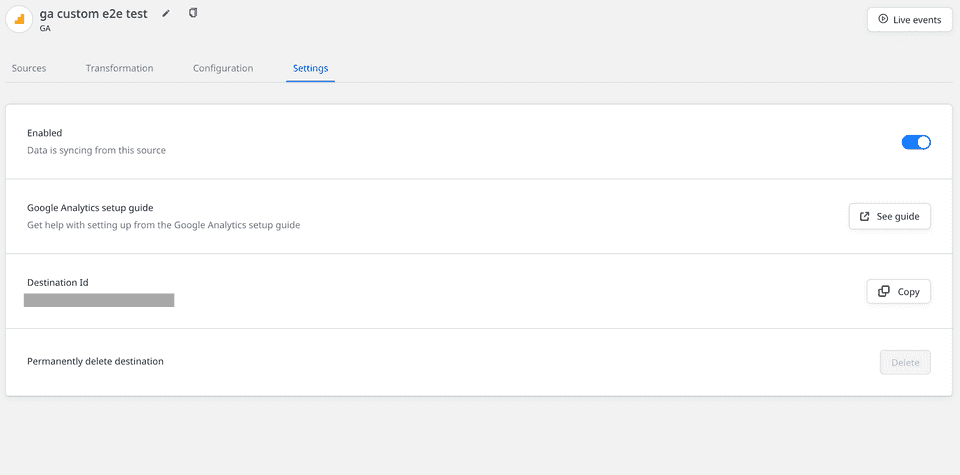
https://hosted.rudderlabs.com/v1/webhook?writeKey=1bCenS7ynqHh8ETX8s5Crjh22J- Then, add a destination in RudderStack and connect it to this webhook source. For this example, we will configure Google Analytics as a destination, as shown:

Follow our guide on Adding a Destination for more details.
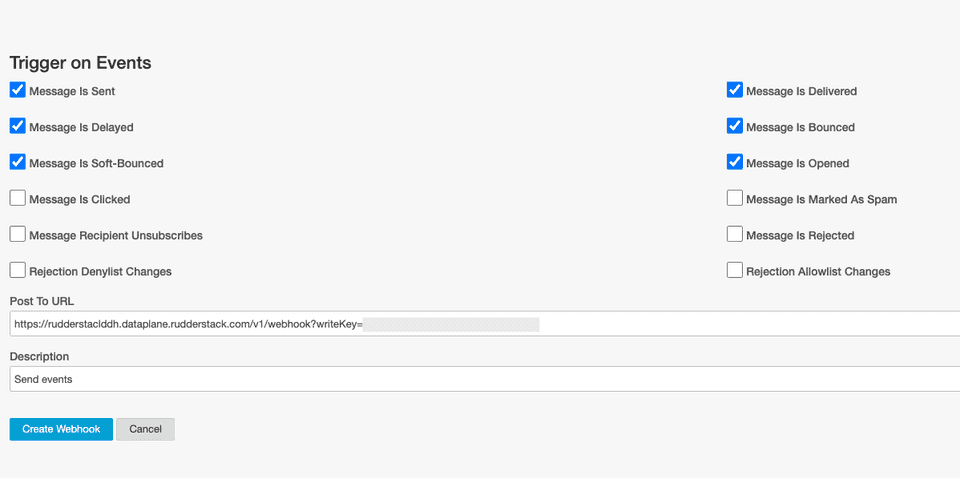
- Next, add the webhook URL to your desired source platform - in this case, Mailchimp.
The following image shows the webhook URL added in Mailchimp:

Add and test your webhook URL. You can use the Live Events functionality to view the events tracked in real time.
- When your users perform any action that is configured in the source, the source platform will automatically send the generated events to the webhook URL.
In this example, Mailchimp sends the updates under Trigger on Events (seen in the image above) as user events to the webhook URL with the content type application/x-www-form-urlencoded.
The content type can vary in case of other webhook sources.
- RudderStack then takes the data, creates the payload and sends it to the destinations connected to the webhook source - Google Analytics in this case.
You must also add the appropriate User Transformation to transform the payload into a destination-specific format before sending it to the destination. Refer to the Payload creation and transformation section for more details.
Payload creation and transformation
This section details how RudderStack receives the data from the webhook source platform and creates the resulting payload.
Continuing with our Mailchimp example, suppose a customer subscribes to Mailchimp. Mailchimp then sends the following data to RudderStack:
type=subscribe&fired_at=2021-07-28+08%3A06%3A59&data%5Bid%5D=e2ff089583&data%5Bemail%5D=ruchira%40rudderlabs.com&data%5Bemail_type%5D=html&data%5Bip_opt%5D=115.187.35.152&data%5Bweb_id%5D=161912900&data%5Bmerges%5D%5BEMAIL%5D=name%40rudderlabs.com&data%5Bmerges%5D%5BFNAME%5D=Name&data%5Bmerges%5D%5BLNAME%5D=Surname&data%5Bmerges%5D%5BADDRESS%5D=&data%5Bmerges%5D%5BPHONE%5D=&data%5Bmerges%5D%5BBIRTHDAY%5D=&data%5Blist_id%5D=ec4689c266RudderStack receives this data and creates the following payload:
{ type: "track", event: "webhook_source_event", rudderId: "044448e2-a674-426c-ba61-8341262babcc", messageId: "4379907d-689a-4e3a-a2f7-477e29a02299", properties: { type: ["subscribe"], "data[id]": ["e2ff089583"], fired_at: ["2021-07-28 08:06:59"], "data[email]": ["[name@rudderlabs.com](mailto:name@rudderlabs.com)"], "data[ip_opt]": ["115.187.35.152"], "data[web_id]": ["161912900"], "data[list_id]": ["ec4689c266"], "data[email_type]": ["html"], "data[merges][EMAIL]": [ "[name@rudderlabs.com](mailto:name@rudderlabs.com)", ], "data[merges][FNAME]": ["Name"], "data[merges][LNAME]": ["Surname"], "data[merges][PHONE]": [""], "data[merges][ADDRESS]": [""], "data[merges][BIRTHDAY]": [""], }, anonymousId: "d6597ba2-54db-4bd7-8769-86ac067b4178",}You can then transform this payload according to the desired destination with the help of RudderStack's Transformation feature.
A sample transformation is as shown below:
export function transformEvent(event) { const updatedEvent = event const { properties } = event
if (properties) { updatedEvent.event = properties.type updatedEvent.userId = properties["data[email]"] updatedEvent.properties.name = `${properties["data[merges][FNAME]"]} ${properties["data[merges][LNAME]"]}` updatedEvent.properties.phone = properties["data[merges][PHONE]"]
delete updatedEvent.properties["data[merges][PHONE]"] delete updatedEvent.properties["data[merges][FNAME]"] delete updatedEvent.properties["data[merges][LNAME]"] }
return updatedEvent}The transformed payload is shown below:
{ type: 'track', event: [ 'subscribe' ], rudderId: '044448e2-a674-426c-ba61-8341262babcc', messageId: '4379907d-689a-4e3a-a2f7-477e29a02299', properties: { type: [ 'subscribe' ], 'data[id]': [ 'e2ff089583' ], fired_at: [ '2021-07-28 08:06:59' ], 'data[email]': [ 'name@rudderlabs.com' ], 'data[ip_opt]': [ '115.187.35.152' ], 'data[web_id]': [ '161912900' ], 'data[list_id]': [ 'ec4689c266' ], 'data[email_type]': [ 'html' ], 'data[merges][EMAIL]': [ 'name@rudderlabs.com' ], 'data[merges][ADDRESS]': [ '' ], 'data[merges][BIRTHDAY]': [ '' ], name: 'Name Surname', phone: [ '' ] }, anonymousId: 'd6597ba2-54db-4bd7-8769-86ac067b4178', userId: [ 'name@rudderlabs.com' ]}RudderStack then sends this payload to your destination - Google Analytics, in this case.
Contact us
For queries on any of the sections covered in this guide, you can contact us or start a conversation in our Slack community.